How to See Uploaded Html Page to Github
GitHub is a cracking place for hosting your HTML websites. It's free and you tin fifty-fifty use your own domain names.
This certificate is an update of a previously published tutorial.
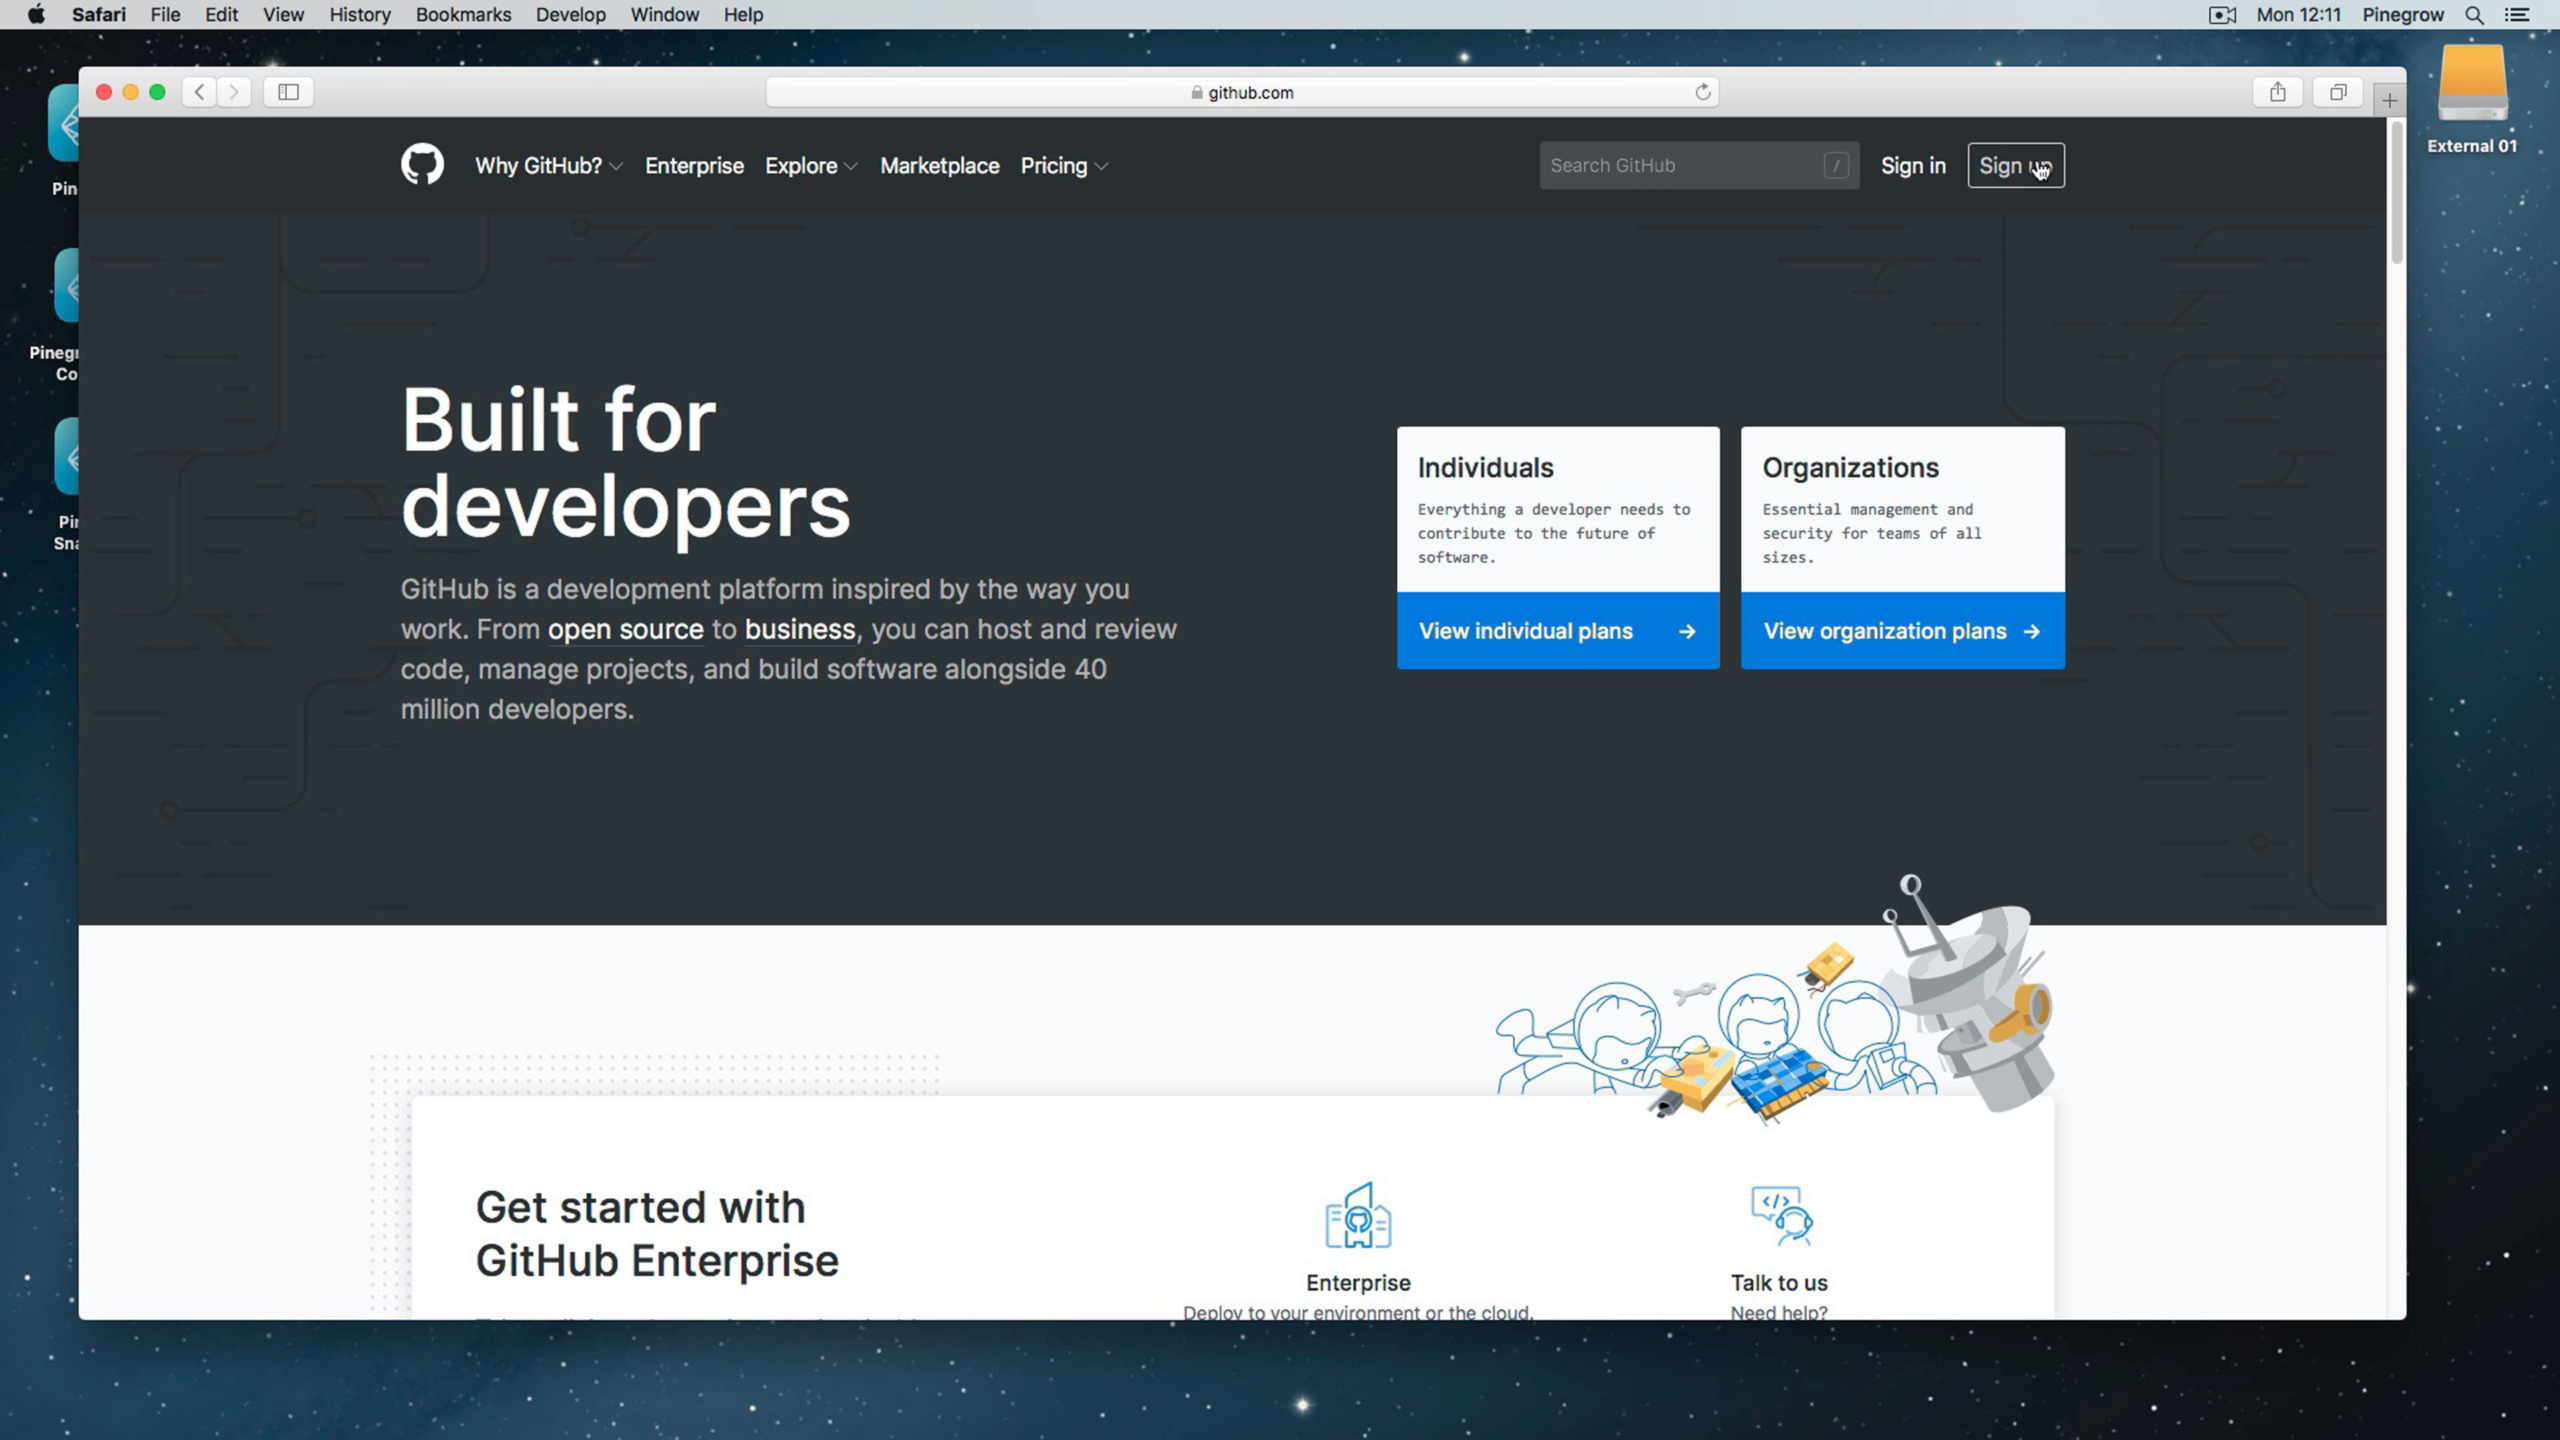
Create a costless GitHub business relationship
- From your web browser, become to https://github.com.
- Sign up for a new account (or Sign in if you already have a GitHub business relationship. For the purpose of this tutorial, we will consider that you lot are a new GitHub user).
- When you accept entered your details, select the Gratis programme for individuals.
- Answer the different questions according to your situation.
- As with most sign ups, afterward doing this, you will have to validate your subscription by clicking on a link received in your mailbox.
- When it's done, you can login to your new GitHub account.
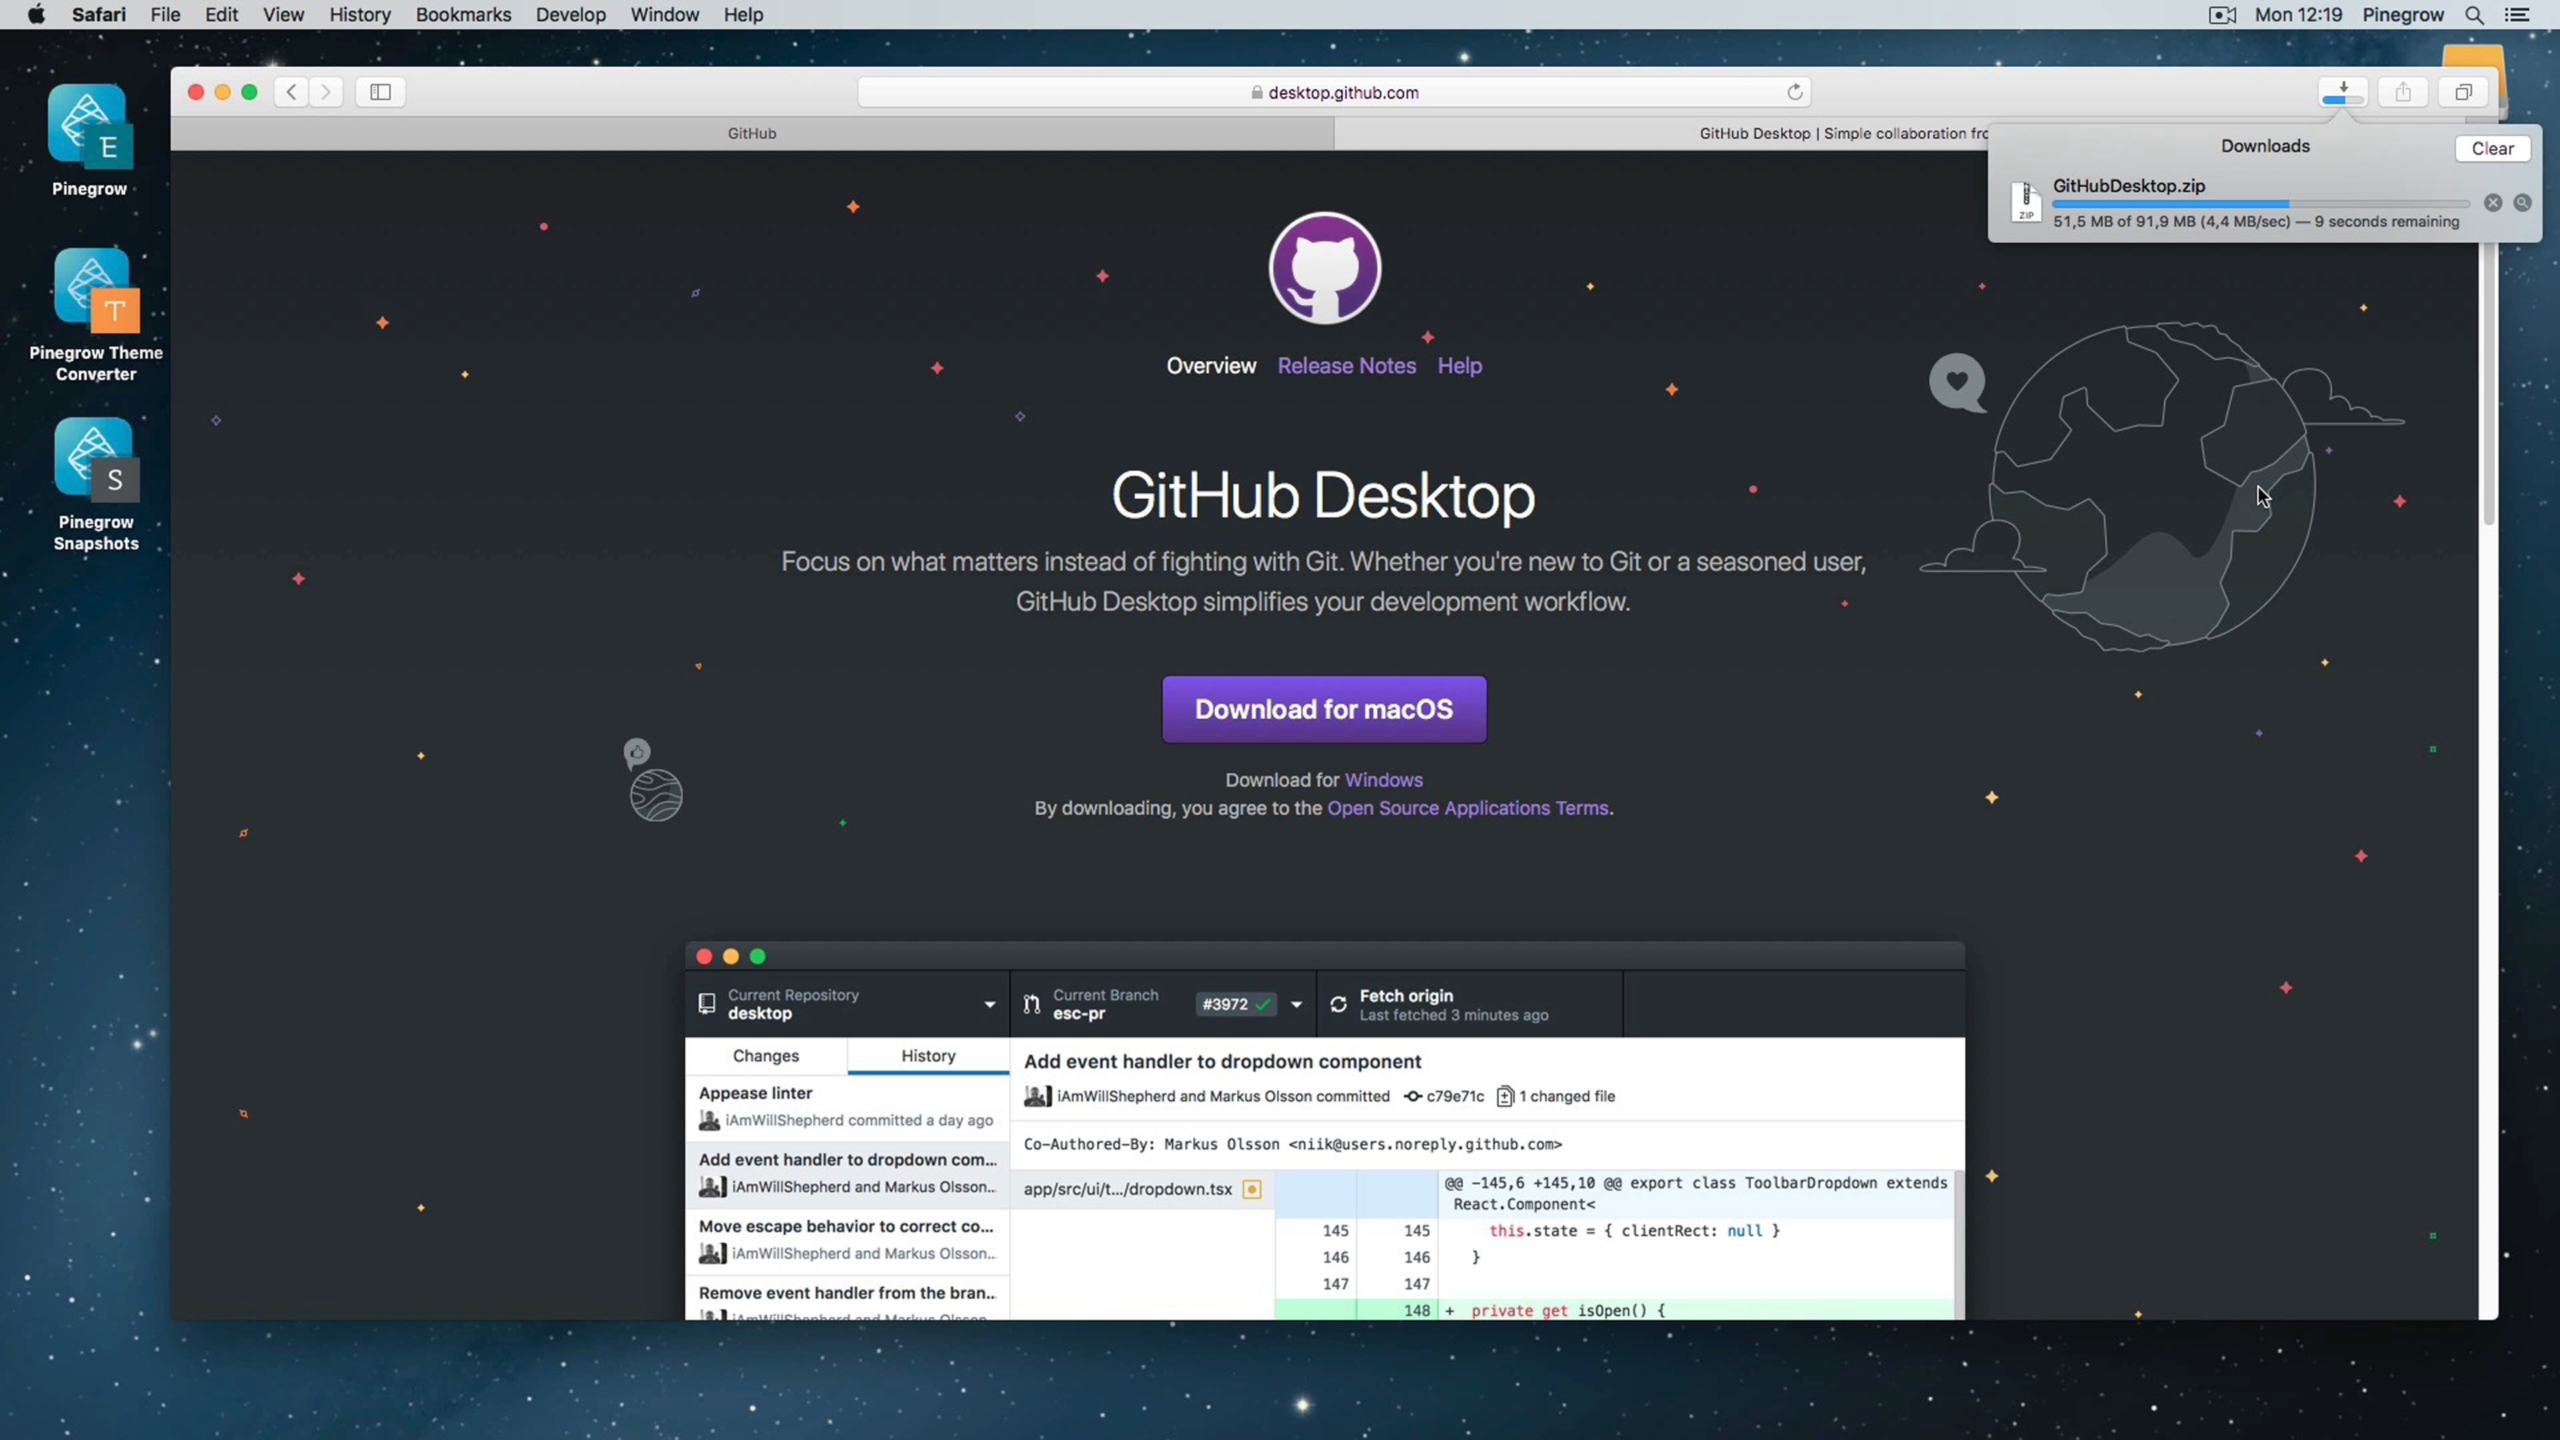
Download and Install the GitHub Desktop Client
- From your browser, go to https://desktop.github.com so yous tin download the GitHub Desktop application.
- When the application is downloaded, install it on your system (we will not evidence this step in the video) and beginning it.
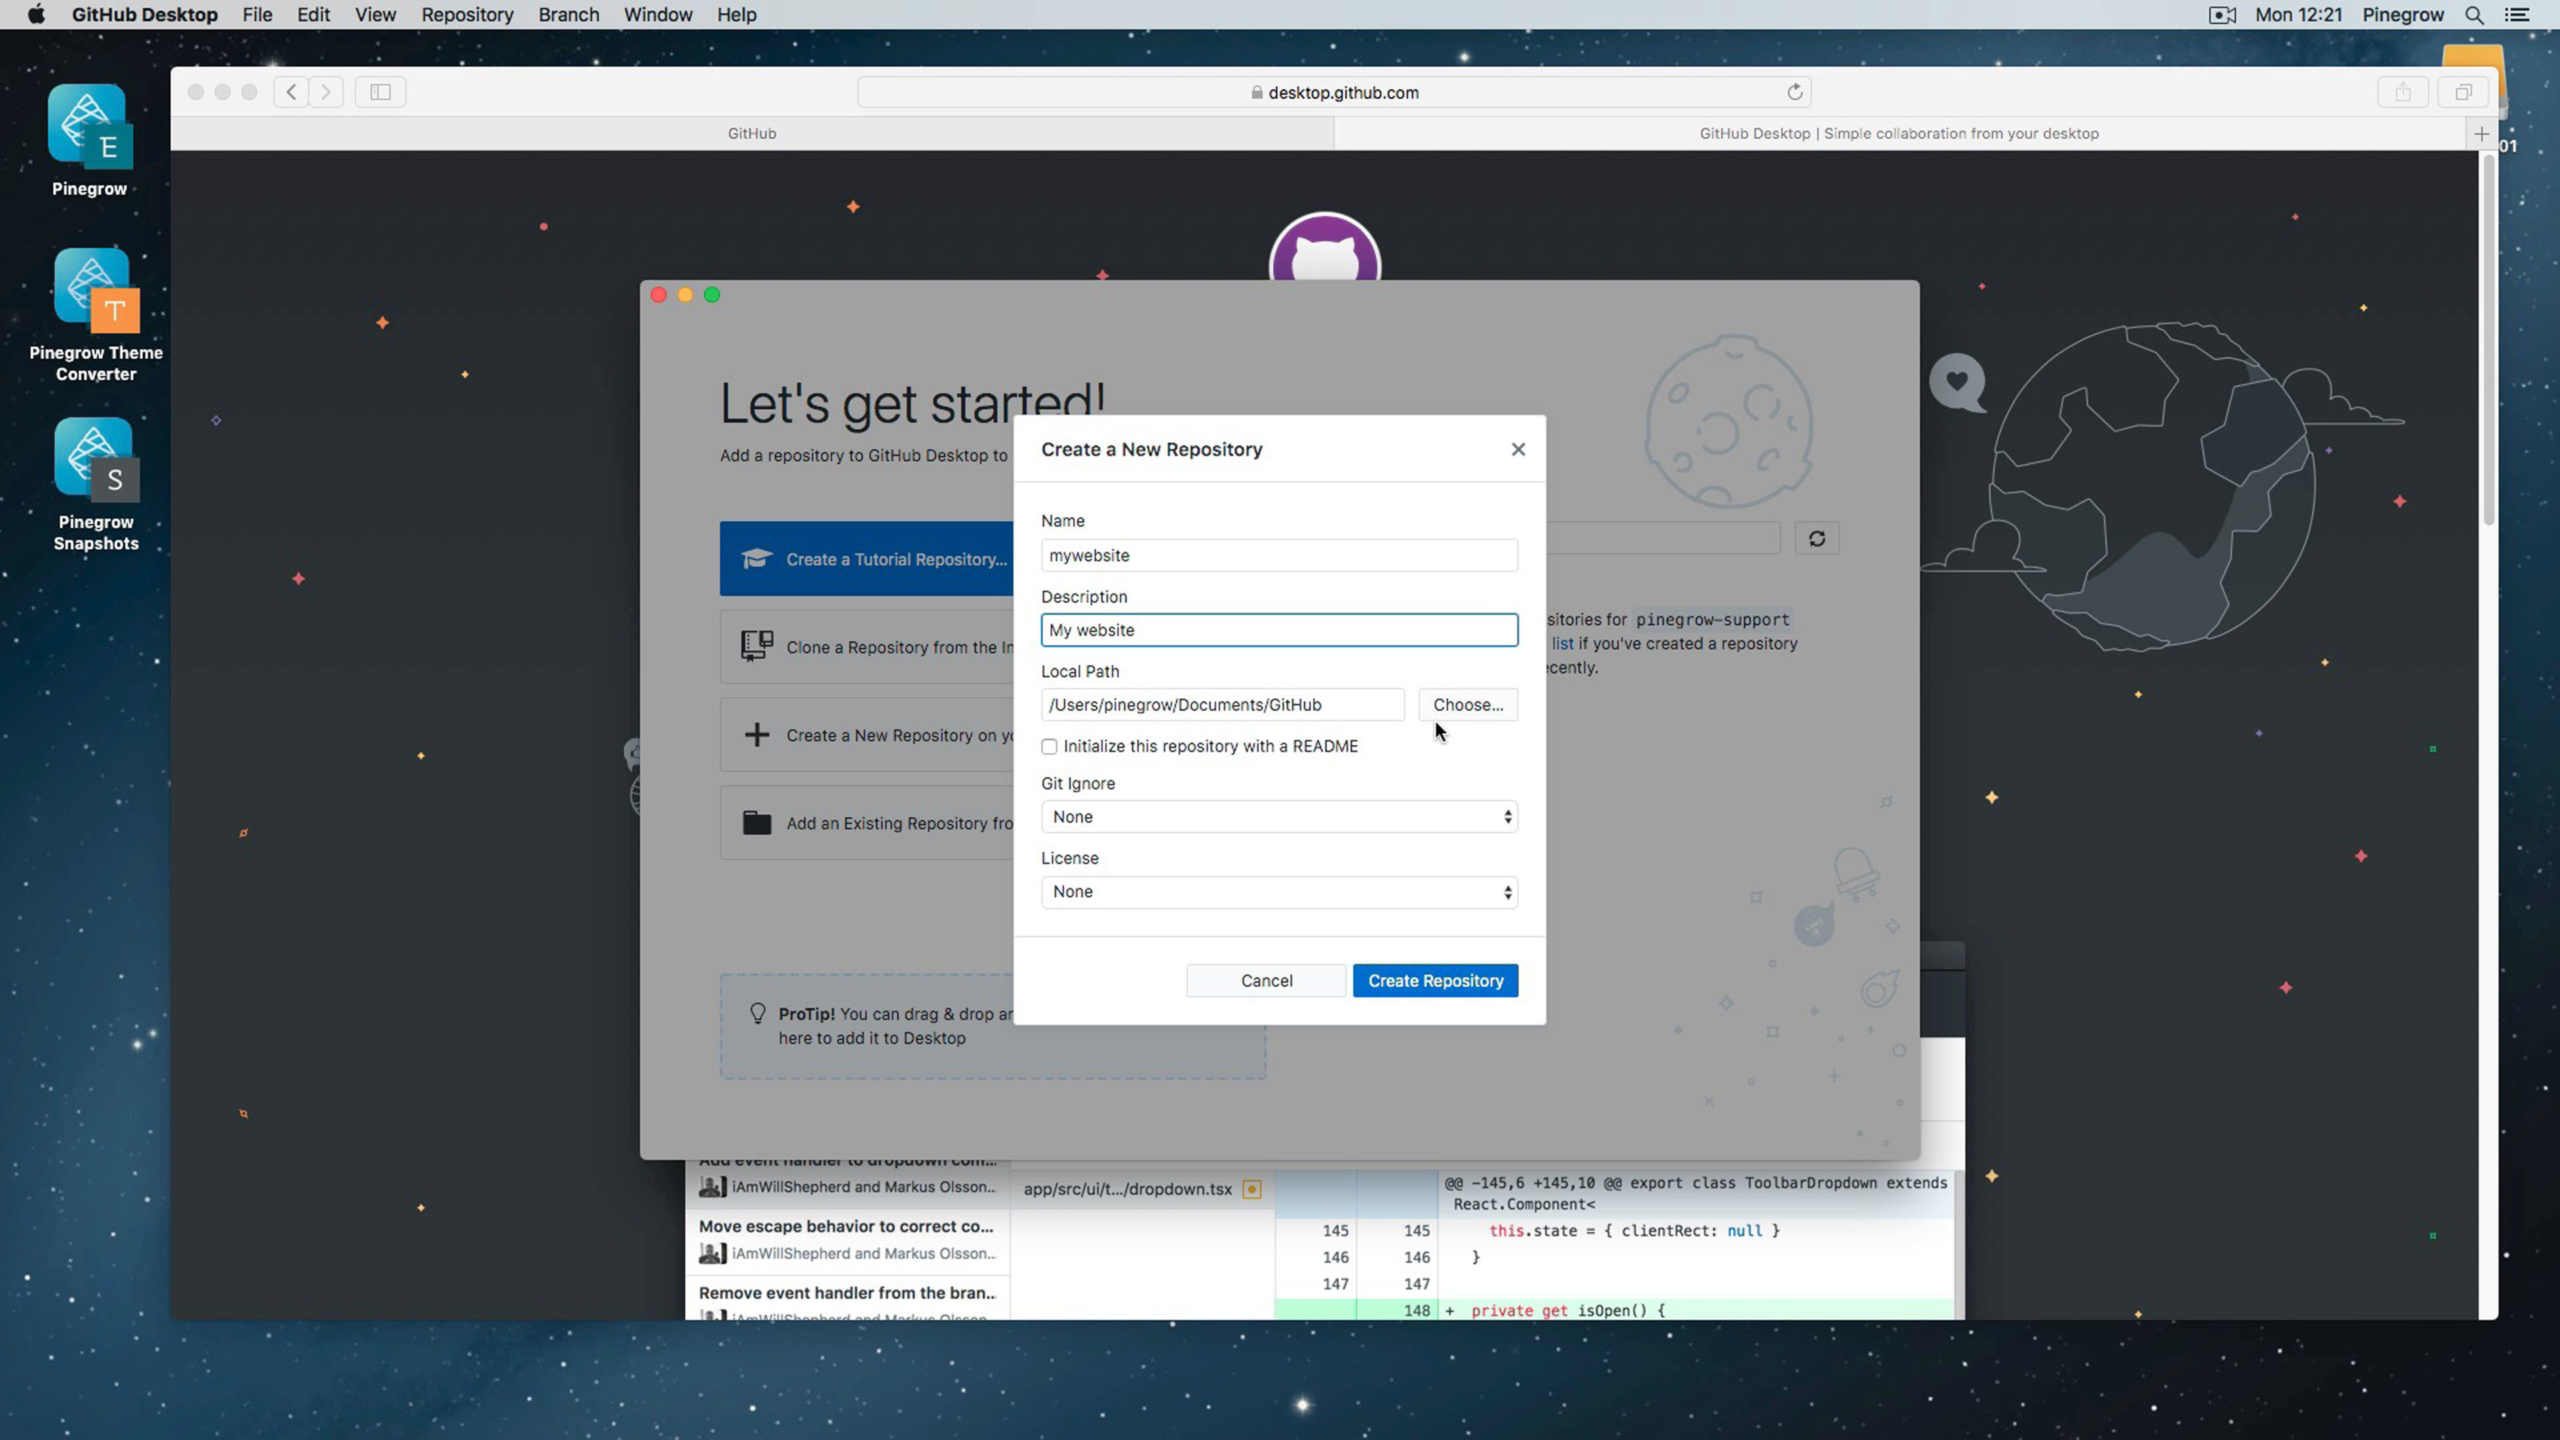
Create your first website repository with the GitHub Desktop Client
- From the first screen, select to Sign in to GitHub.com.
- Enter your GitHub username or email address and your password then click on the Sign in push.
- Y'all are at present asked to configure Git, then enter a proper noun and a valid email.
- Click the Continue button so click on Finish.
- Select Create a New Repository on your Hard Drive.
- Enter your repository Name and Description.
- Select the Local Path on your computer hard drive.
- You tin can also configure a few other options as per your needs.
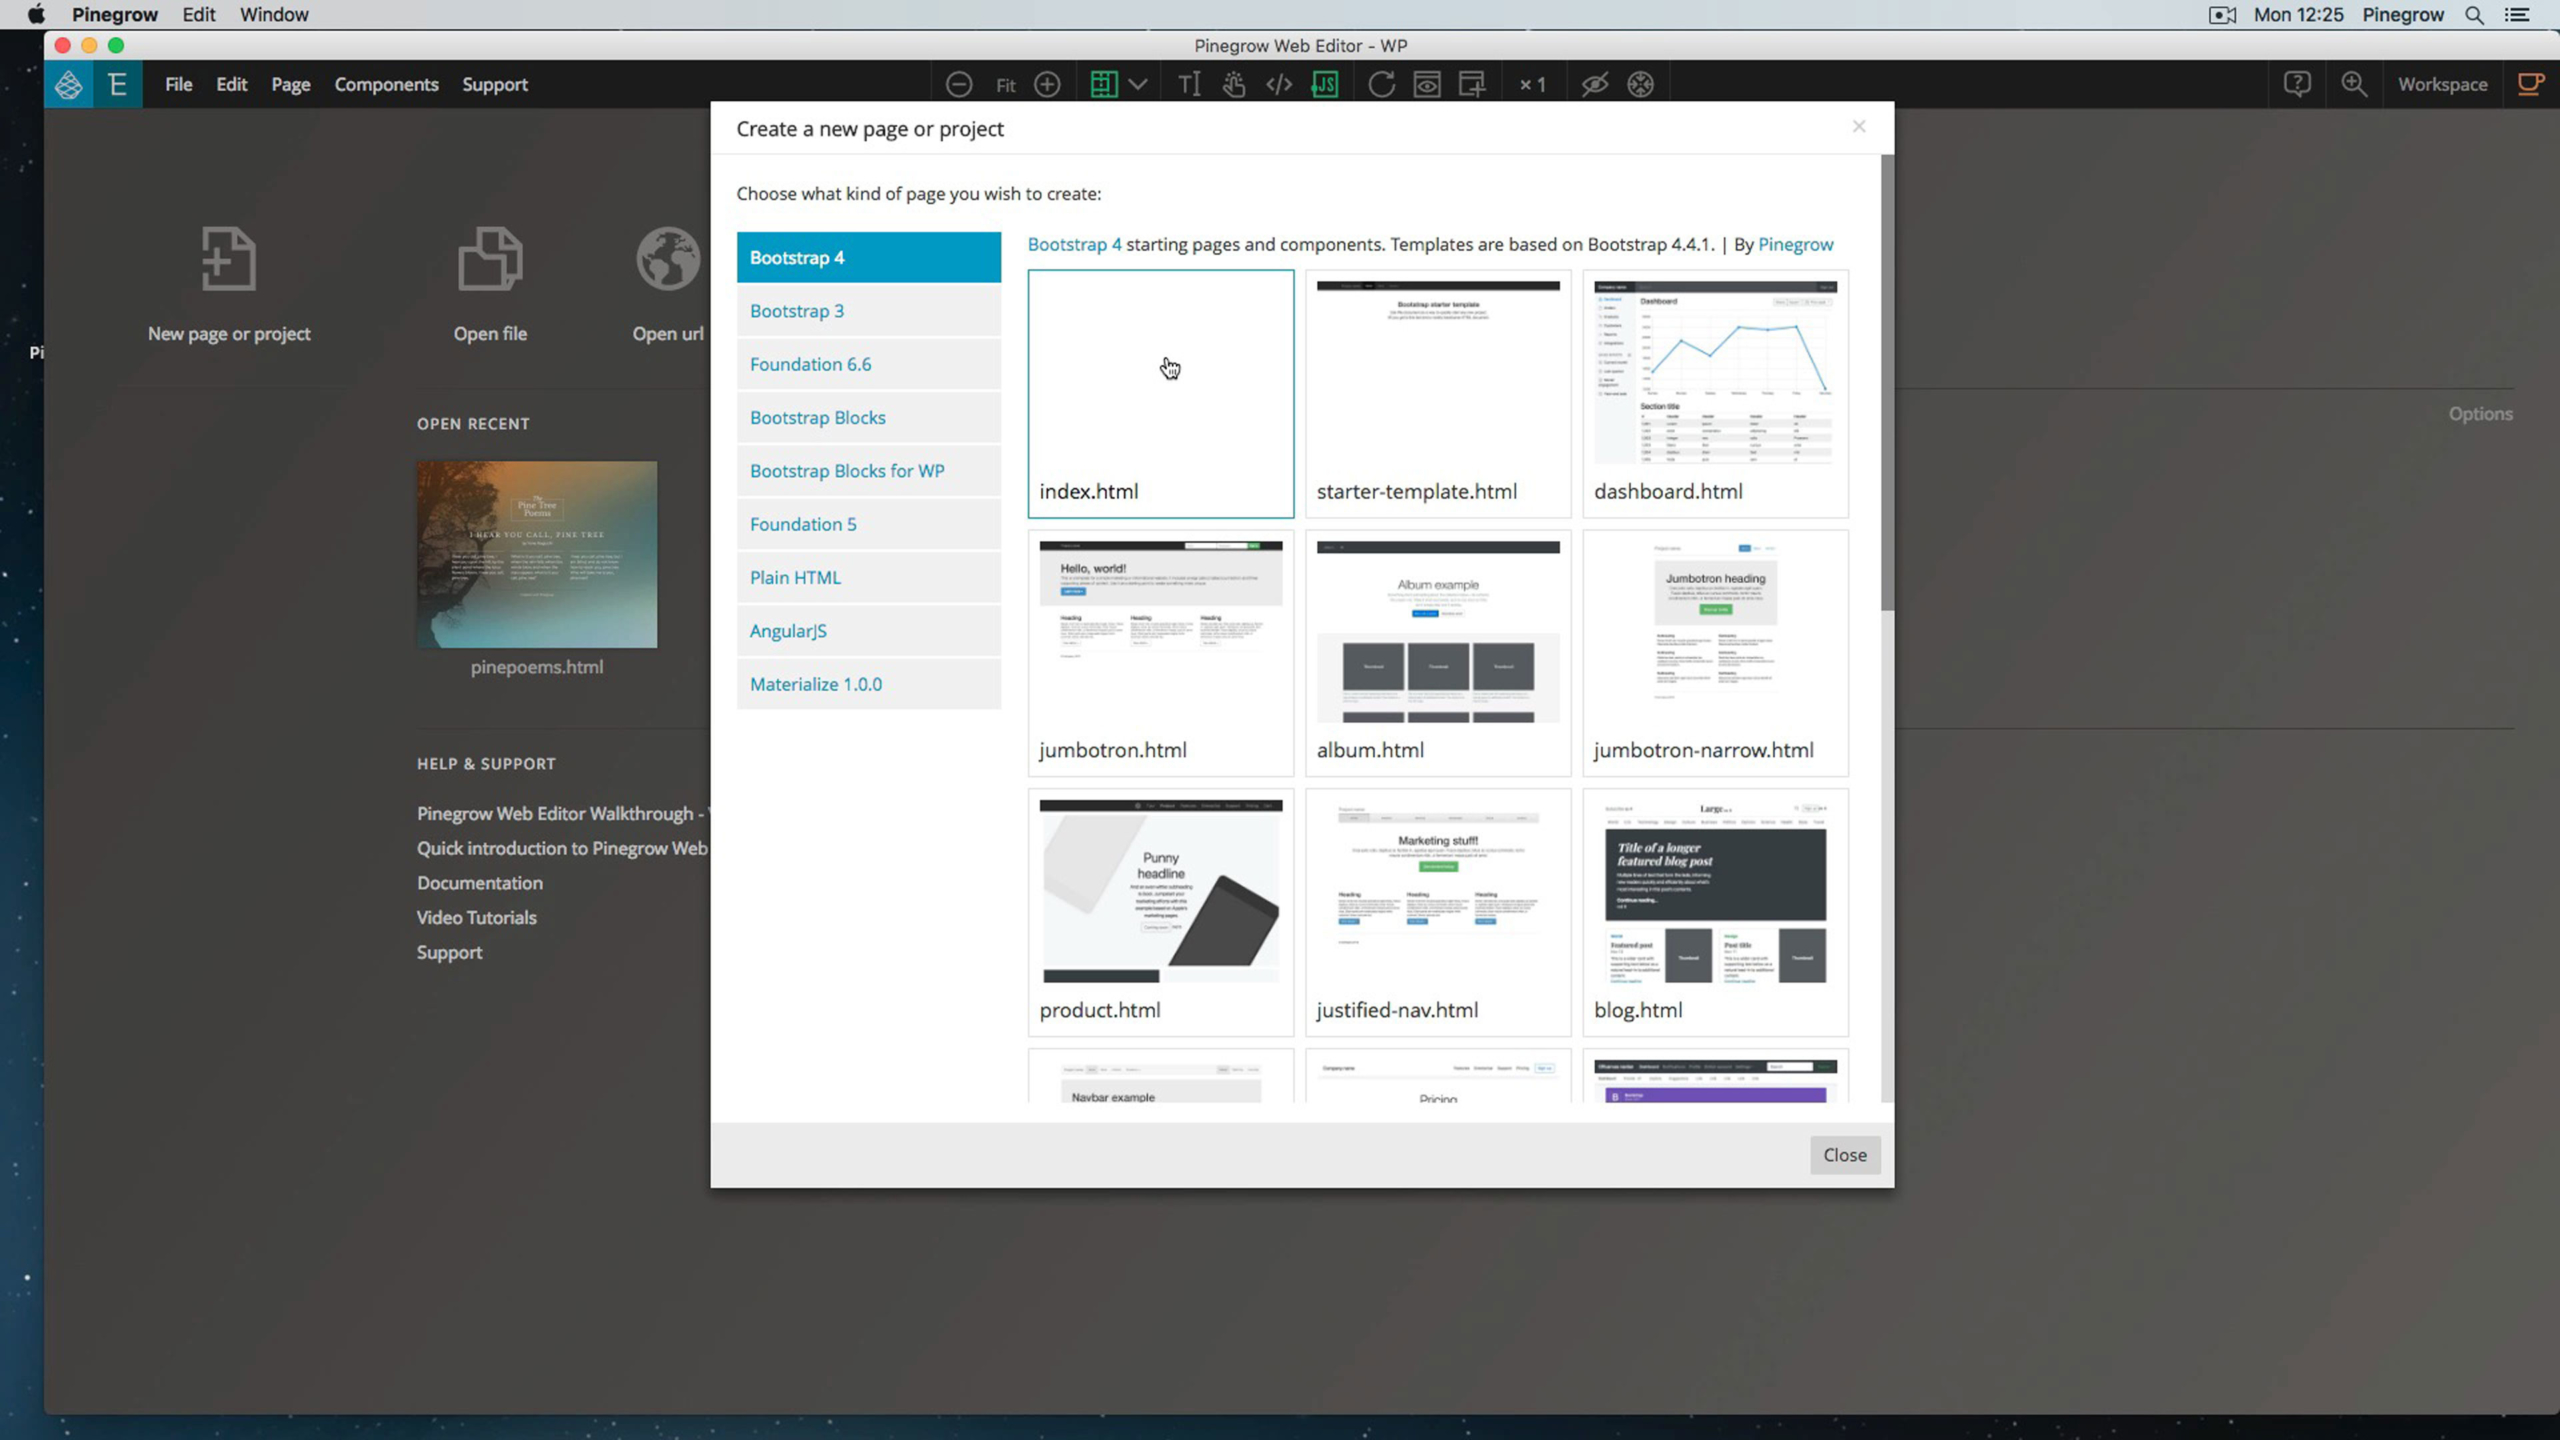
Create your website projection with Pinegrow
- Start Pinegrow and create a new website project.
- Then save the projection in your local Git repository location.
- If y'all switch to your GitHub Desktop application, you volition run into the changes already visible within your local repository.
- Add a few elements to the design of your alphabetize page and Relieve the document.
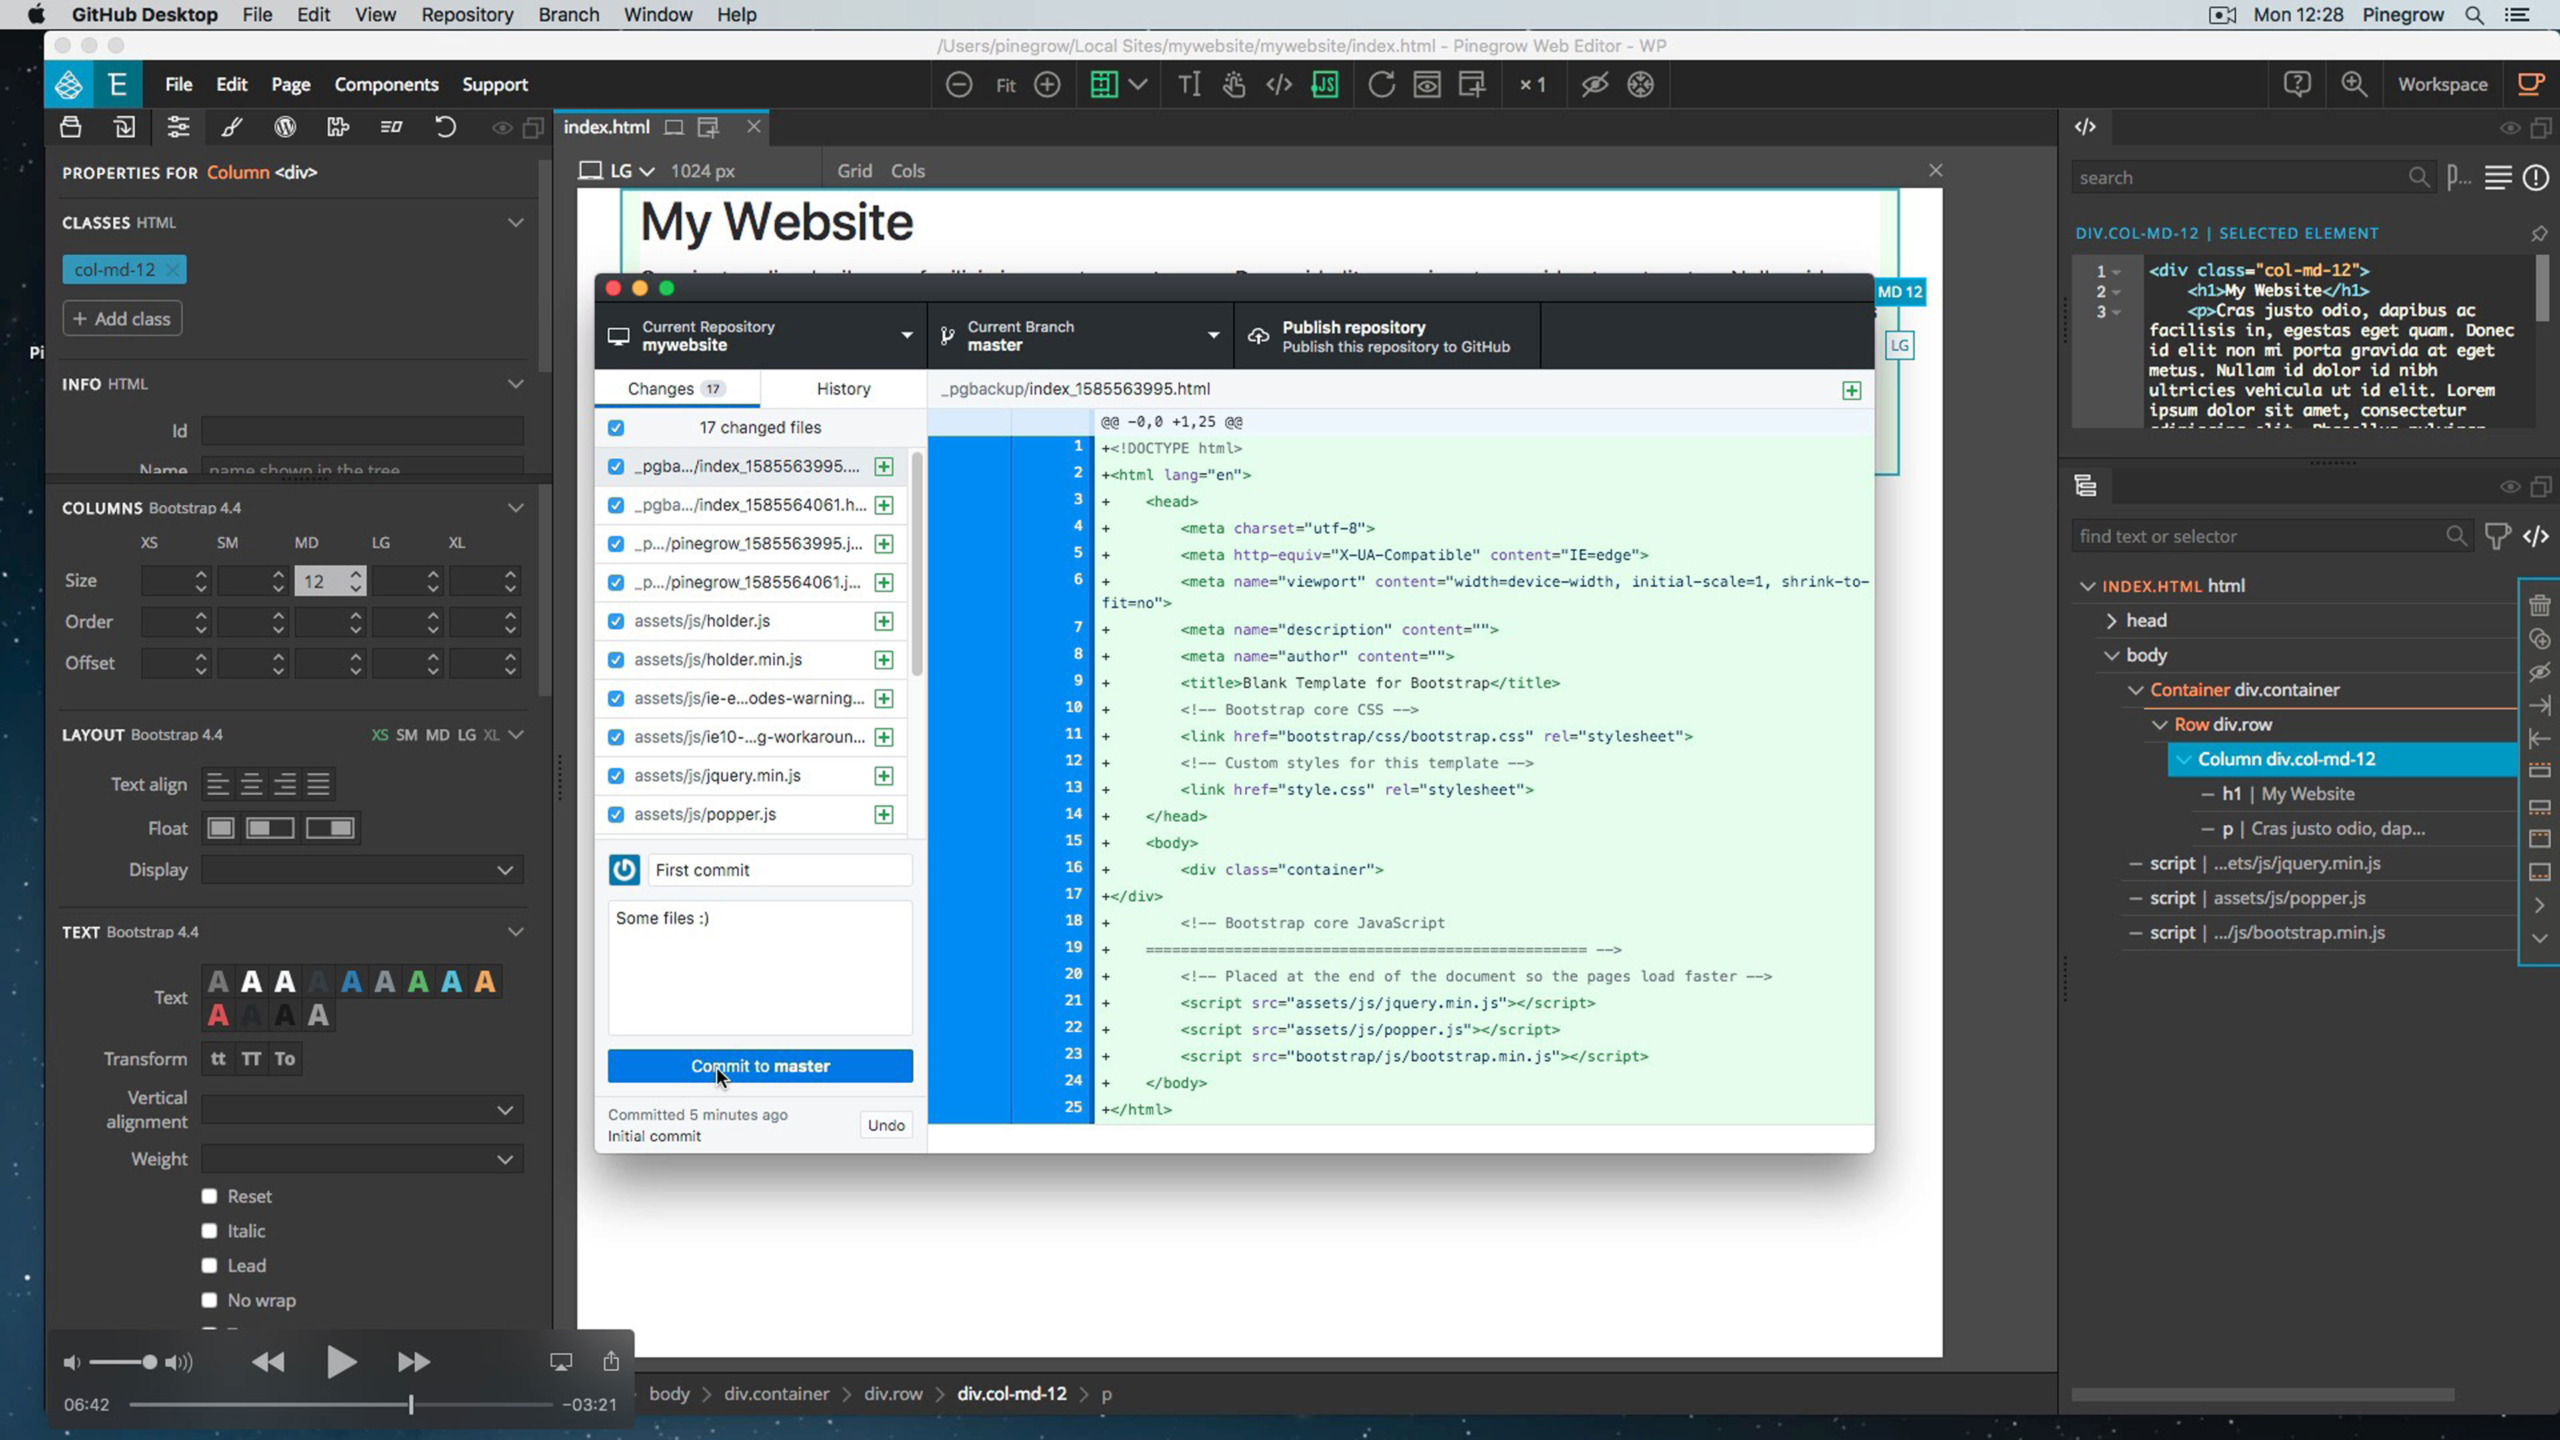
Proceed to your beginning Git commit and publish on GitHub.com
- It is now fourth dimension for your very get-go commit.
- Enter a summary for your commit and a full clarification of the changes. Then click on Commit to main.
- Because your repository is currently just available on your local car, you now take to publish it to GitHub.com.
- Confirm the repository details, uncheck Keep this code private and click on Publish repository.
- By having a look at the History tab, you tin can see what was committed.
- From the browser, refresh your GitHub screen and y'all now meet your repository.
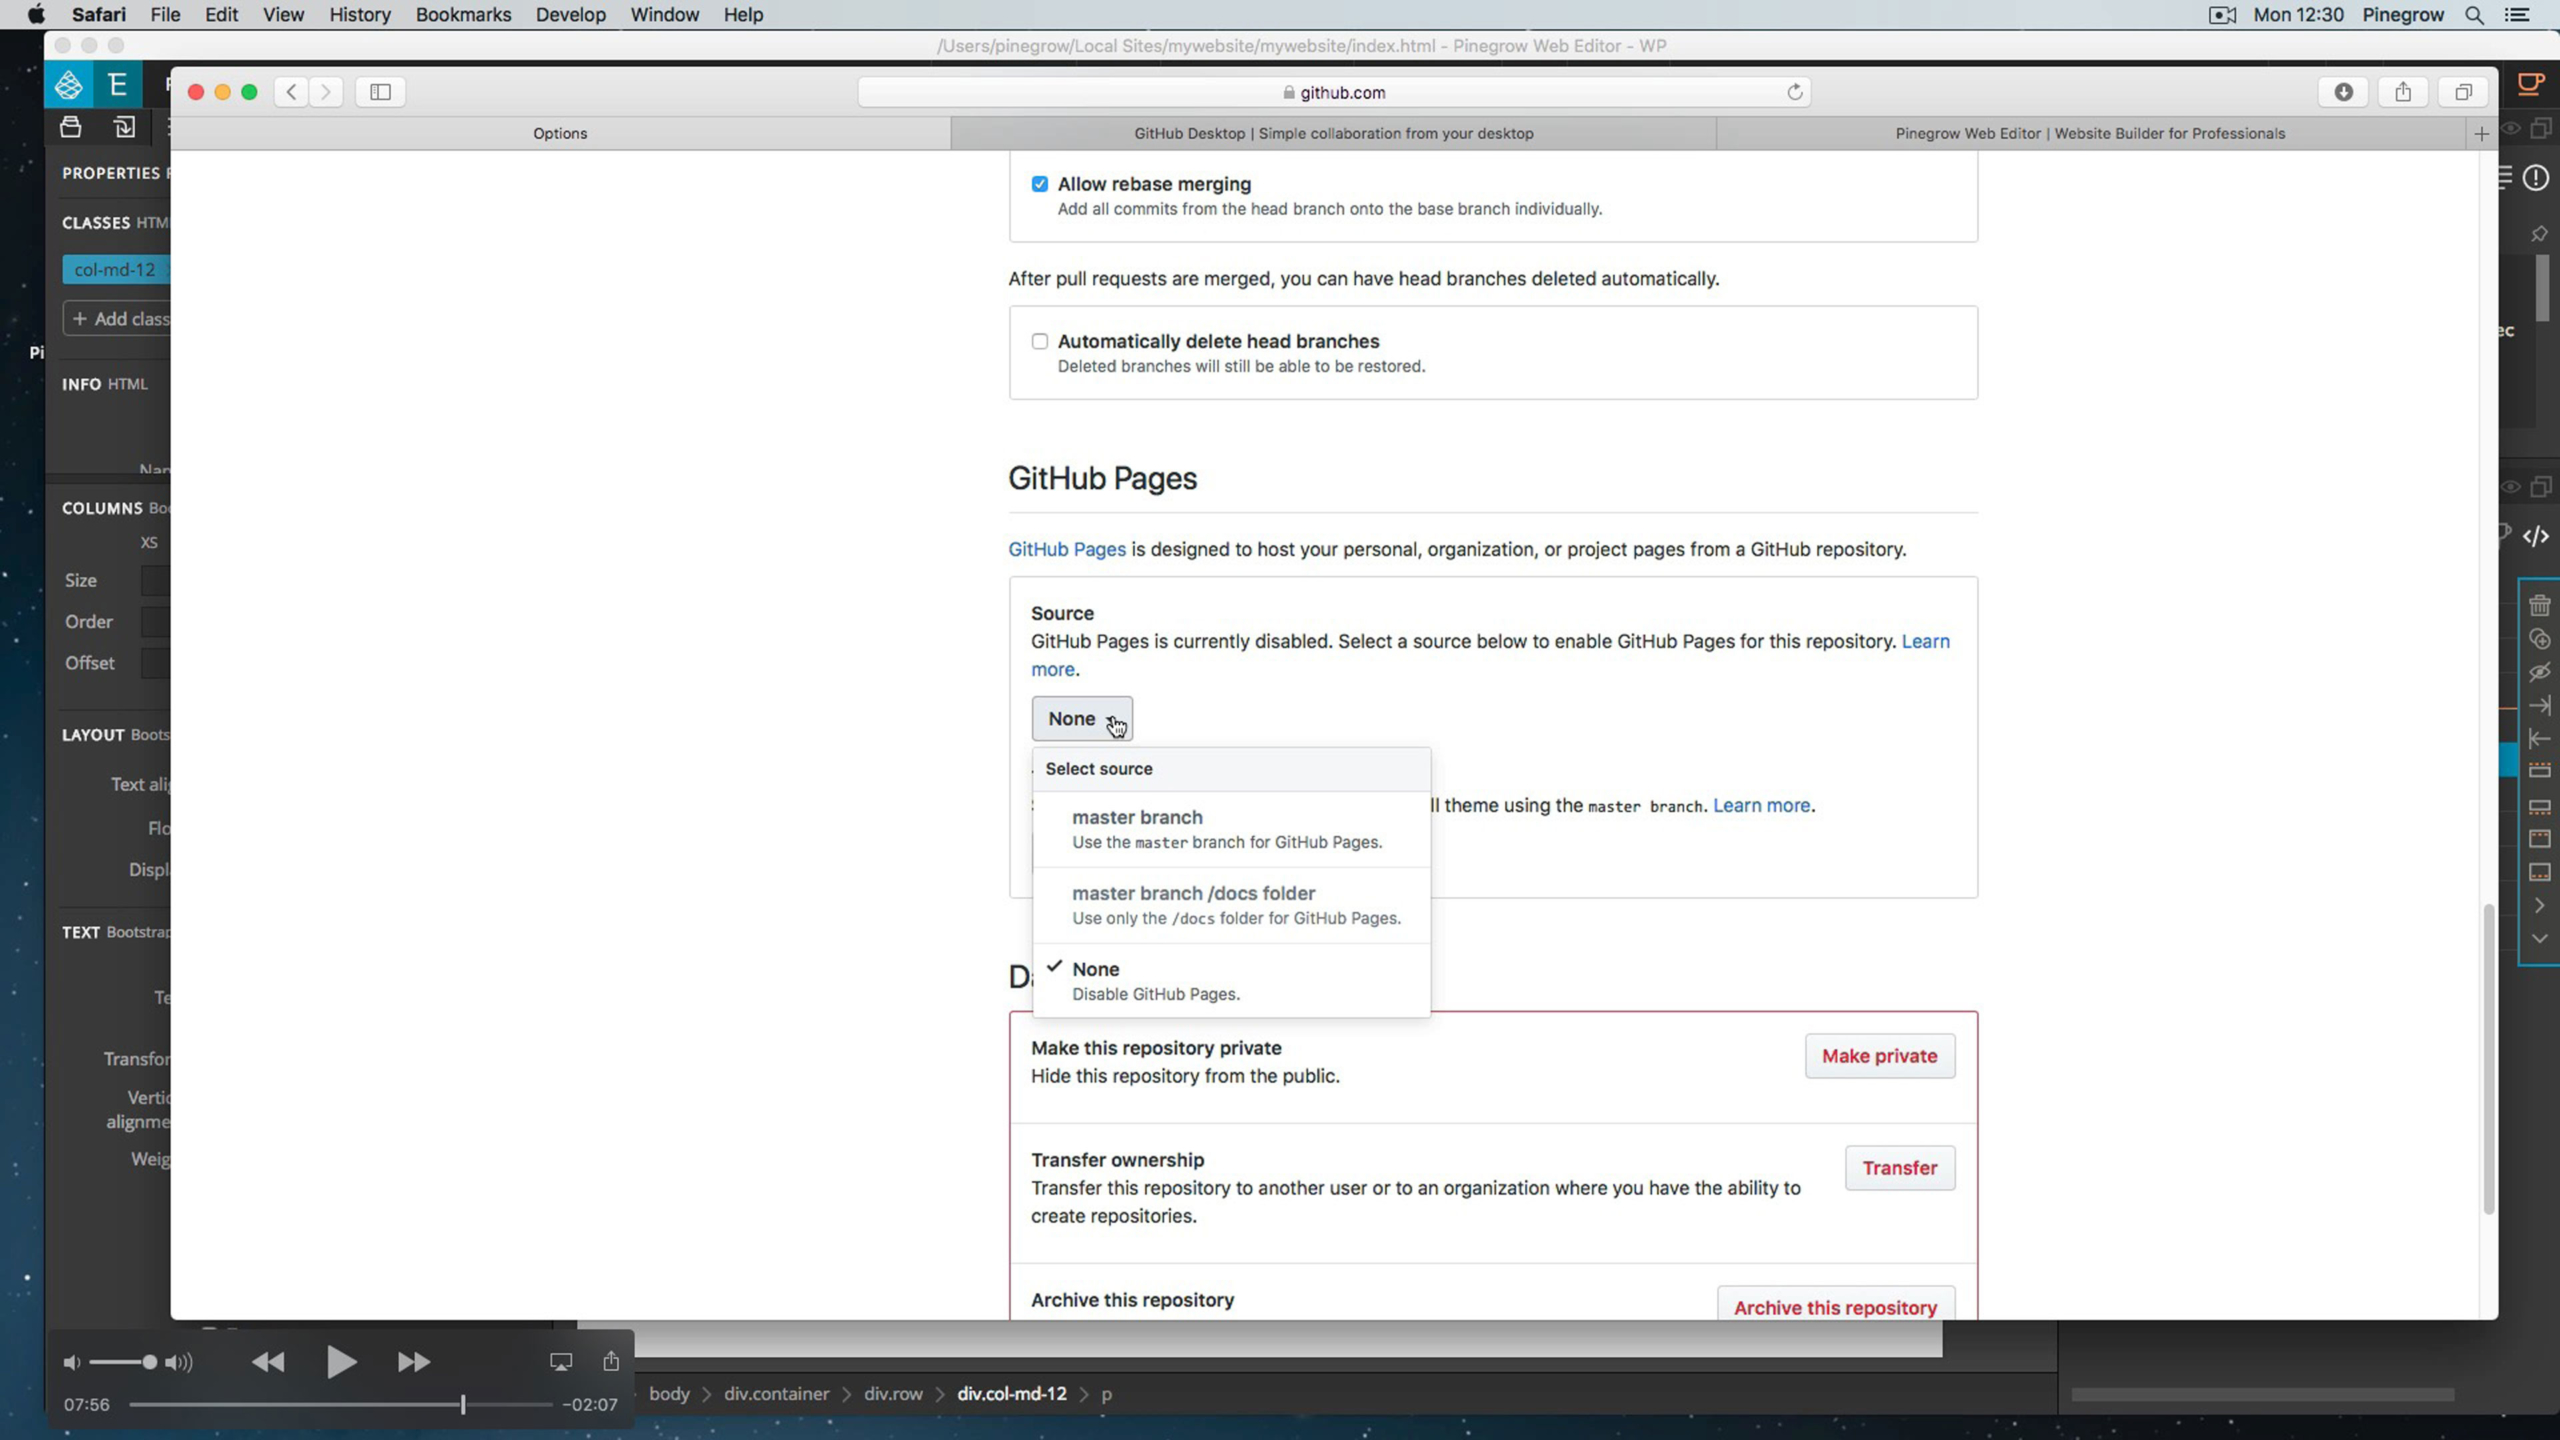
Setup GitHub Pages and actuate your live site
- Select it, and get to the settings tab.
- Scroll to the GitHub Pages settings.
- Select the source of the Pages. Here, this is the Master branch.
- The changes are automatically saved and the page is reloaded. Curlicue once again to the GitHub Pages settings.
- GitHub now provides yous with the URL of your website.
- Click on the URL and you are automatically redirected to your live site which is now available for everyone.
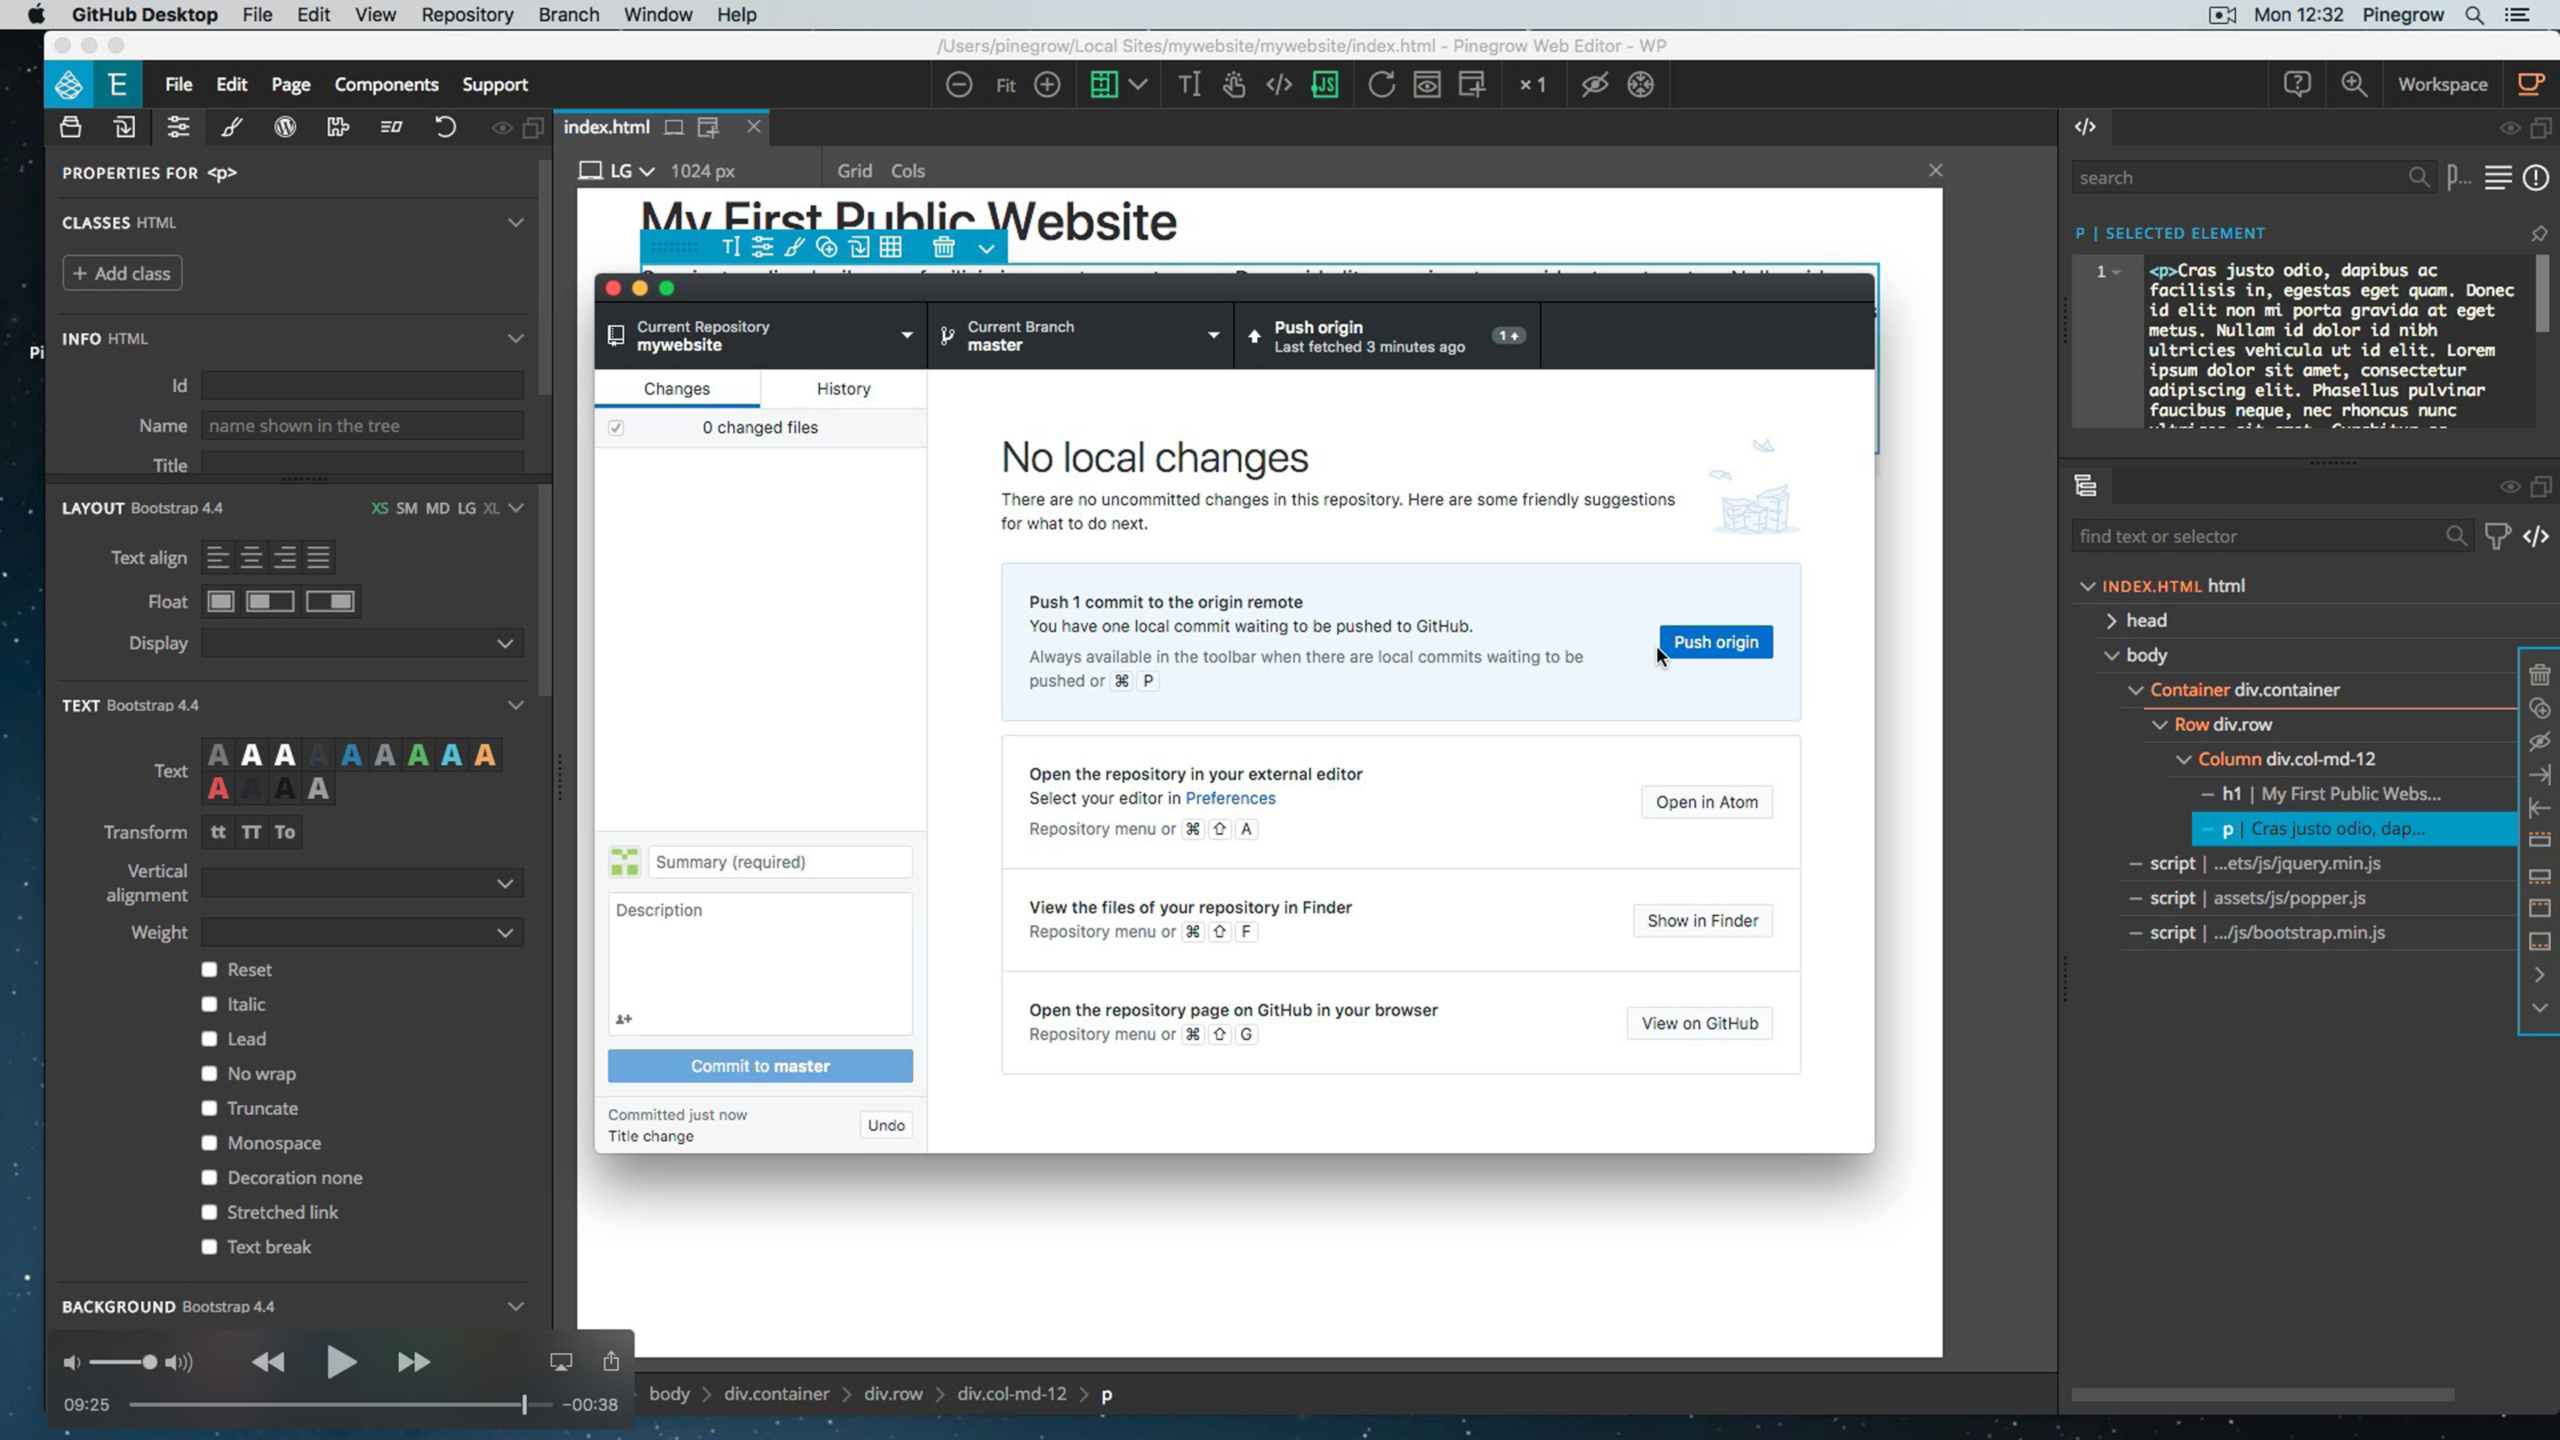
Make some more than changes to your website and publish the changes
- From Pinegrow, make some changes to your project and Save information technology.
- Proceed to a new commit to the main.
- Push the commit to the origin remote.
- And check your modifications from the browser. The changes will appear on the live site after a few minutes.
Usage limits
GitHub Pages sites are subject to the following usage limits:
- GitHub Pages source repositories have a recommended limit of 1GB.
- Published GitHub Pages sites may be no larger than 1 GB.
- Hub Pages sites have a soft bandwidth limit of 100GB per month.
- GitHub Pages sites have a soft limit of 10 builds per hr.
Read more than nearly GitHub usage limits.
Prohibited uses
GitHub Pages is not intended for or allowed to exist used as a free web hosting service to run your online business organization, e-commerce site, or any other website that is primarily directed at either facilitating commercial transactions or providing commercial software every bit a service (SaaS).
Read more about GitHub prohibited uses.
Going farther
Information technology'south totally possible to set up your own domain on GitHub Pages. Beneath are a few tutorials that will help y'all go started.
- Using custom domain for GitHub pages
- Configuring a custom domain for your GitHub Pages site
Discuss this tutorial
Have questions or comments about this tutorial? Let's talk nigh information technology on our forum.
Source: https://pinegrow.com/tutorials/how-to-host-your-html-website-on-github-pages-for-free/
0 Response to "How to See Uploaded Html Page to Github"
Post a Comment